

Key Takeaways
- Change camera height, position, distance, and direction to make familiar shots feel fresh.
- Try low, high, overhead, ground-level, three-quarter, POV, and rear angles.
- Use foreground objects, reflections, and your surroundings to add depth.
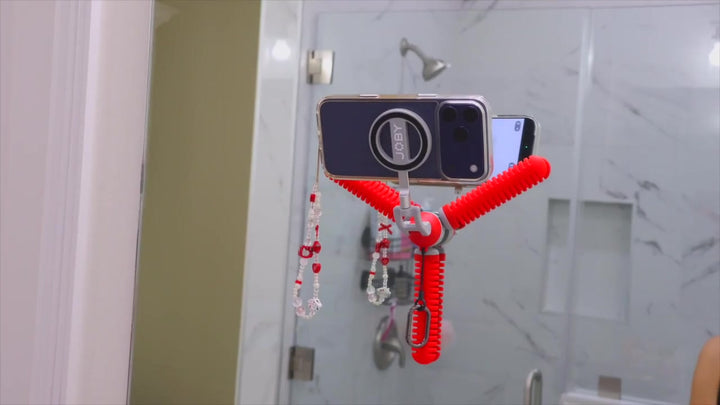
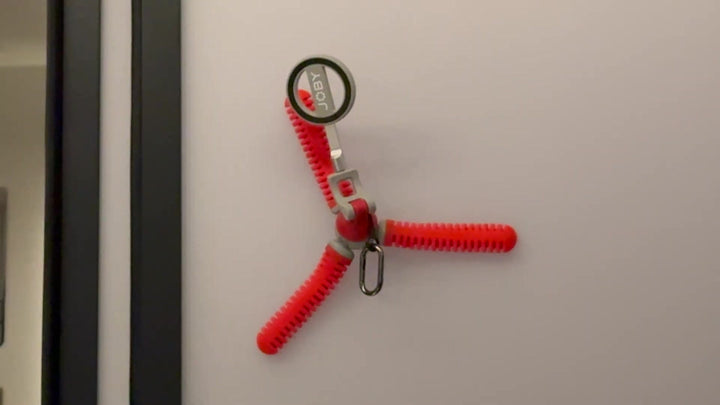
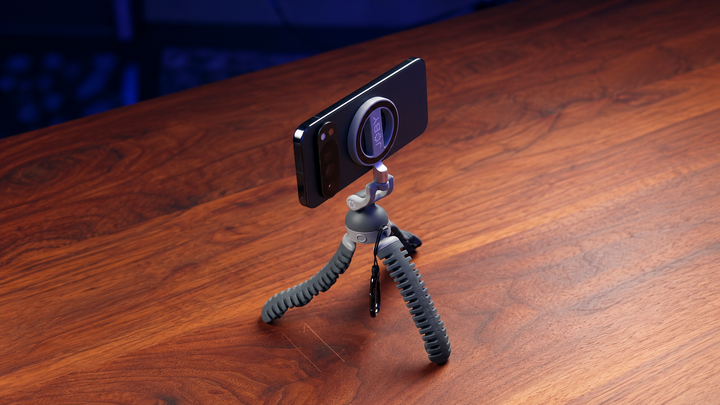
- A flexible tripod stand can help you hold unusual camera positions with less effort.
- Keep creative angles purposeful. A different viewpoint should improve the subject, story, or composition.
If your photos or videos often look too similar, the camera may be sitting in the same place for every shot. Eye-level framing is useful, but it can become predictable when you never change your viewpoint.
Small changes in camera height, position, distance, and direction can give the same subject a completely different look. Camera angle also affects how much of the background appears, how large the subject feels, and where the viewer looks first.
The key is to stop treating the camera position as fixed. Move it higher, lower, closer, farther away, or to another side of the subject. Then compare the results and keep the angles that make the shot stronger.
Change Your Camera Height for More Creative Camera Angles

Camera height is a simple way to change a shot without changing the subject or location. Moving above or below eye level can change the mood, scale, and amount of the surrounding space.
Try Low-Angle Camera Shots
A low-angle shot places the camera below the subject and points it upward. This can make people, buildings, trees, and other tall subjects feel larger or more powerful.
For outdoor videos, try placing the camera close to the ground while a person walks, runs, cycles, or approaches the camera. A low position can also make the foreground appear larger, which adds depth to the frame.
Keep the camera far enough from a person's face to avoid unwanted distortion. A very close wide-angle shot can exaggerate features near the lens.
Experiment With High-Angle Camera Shots
A high-angle shot places the camera above the subject and points it downward. This position can reveal more of the floor, table, landscape, or surrounding activity.
Try this angle for:
- Food and tabletop photography
- Craft projects
- Product demonstrations
- Desk setups
- Packing videos
- Group activities
- Outdoor scenes
A high angle can also make a busy scene easier to read because the viewer can see how different elements are arranged.
Go Down to Ground Level
Ground-level photography can make ordinary subjects look surprisingly different. Place the camera near the floor or ground and shoot across the surface instead of standing above it.
This works well with pets, children, shoes, sports equipment, bicycles, plants, and outdoor activities. A low position can reveal details that disappear from a standing viewpoint.
Move Around Your Subject for Different Camera Perspectives
Changing your horizontal position can be just as effective as changing camera height. Instead of keeping the camera directly in front of your subject, move around and look for a stronger relationship between the subject and its surroundings.
Move Beyond the Straight-On Camera Angle
Start with a front-facing shot, then move about 30 to 45 degrees to either side. This creates a three-quarter view that can show more depth while keeping important details visible.
You can continue moving around the subject to capture:
- Front view
- Three-quarter view
- Side profile
- Three-quarter rear view
- Rear view
A three-quarter angle is especially useful for portraits because it can show both the face and the shape of the body. It can also create more depth than a flat, straight-on composition.
Try a Three-Quarter Camera Angle
Three-quarter framing is a useful choice when a straight-on shot feels flat but a full profile hides too much information.
For a person, position the camera slightly to the side instead of directly in front. For a product, turn either the camera or the product so the front and side surfaces are visible.
Diagonal lines created by this position can make the frame feel more active. They also give the viewer more visual information than a completely flat front view.
Shoot From Behind for a Different Perspective

A rear angle can tell a different story because the viewer sees what the subject is facing rather than focusing on the subject's face.
Try this during:
- Hiking
- Travel
- Walking scenes
- Outdoor activities
- Street photography
- Lifestyle videos
For example, a person standing at a scenic overlook may look ordinary from the front. From behind, the frame can include the person's silhouette and the landscape ahead.
Change Camera Distance to Create More Variety
Camera distance affects perspective, not only how much of the subject fits inside the frame. Moving closer can exaggerate the size difference between nearby and distant parts of a subject, while moving farther away can reduce that effect.
Step Back for More Context
A wider shot shows the subject together with its surroundings. This works well for travel, outdoor activities, architecture, events, and lifestyle content.
Instead of filling the frame with a person, step back and include the trail, room, street, or landscape around them. The setting can add useful information and give the viewer a stronger sense of place.
Move Closer for Details
Close shots work well for small actions and details that may disappear in a wider frame.
Try filming:
- Hands using a product
- Texture on clothing
- Food preparation
- Camera controls
- Craft materials
- Facial expressions
- Small movements
You can also use close-ups as supporting footage between wider shots. This gives you more visual options during editing.
Combine Wide, Medium, and Close Shots
For example, if you are filming someone making coffee, start with a wide shot of the kitchen. Follow it with a medium shot of the person, then capture close-ups of the coffee beans, hands, and pouring action.
Different shot sizes give you more choices during editing and help keep the sequence visually varied.
Use POV and Over-the-Shoulder Camera Angles
Some camera angles work because they place the viewer closer to the action. POV and over-the-shoulder shots can make an activity feel more personal and direct.
Try a Point-of-View Camera Shot
A POV shot places the camera where the viewer might expect the subject's eyes to be. This can make the audience feel like they are taking part in the activity.
POV works well for:
- Cooking
- Cycling
- Hiking
- Unboxing
- Drawing
- Building projects
- Product demonstrations
For solo creators, a tripod or flexible tripod stand can help position the camera at a useful POV without requiring another person to hold it.
Experiment With Over-the-Shoulder Shots
An over-the-shoulder shot places the camera behind a person while showing what they are looking at or doing. This works well for demonstrations and conversations. For example, you can film a person adjusting a camera while showing the controls from behind their shoulder.
The shot gives the viewer both the person and the action, making it useful for tutorials and process-based content.
Use Your Surroundings to Create Creative Camera Frames
You can create fresh camera angles without moving the subject or changing your equipment. Look around the location for objects that can become part of the composition.
Shoot Through Foreground Objects
Place something between the camera and the subject. Leaves, doorways, windows, railings, furniture, and other objects can create a natural frame. This adds foreground, middle ground, and background layers to the image. The extra depth can make a simple shot feel more dimensional. For example, instead of filming someone walking through a doorway from an open space, place the camera partly behind the door frame. The frame itself becomes part of the composition.
Use Reflections for a Different View
Try photographing a person through a store window or capturing a building in a puddle. You can also place a mirror near a product and frame both the object and its reflection.
Reflections work best when you pay attention to unwanted glare and distractions. Move the camera slightly until the reflection supports the subject instead of competing with it.
Use Natural Frames Around Your Subject
Look for arches, branches, windows, doorways, fences, and other shapes that can surround the subject.
These elements can guide attention toward the main subject. A strong frame does not need to be perfectly symmetrical. It simply needs to help separate the subject from the rest of the scene.
Try Overhead and Unusual Camera Perspectives
After testing basic high, low, and side angles, try more unusual viewpoints. These can give common subjects a fresh look, but they work best when the unusual perspective serves a clear purpose.
Capture Top-Down Camera Shots
A top-down shot points the camera almost directly toward the ground or a flat surface.
This is especially useful for:
- Flat lays
- Food
- Product photography
- Art projects
- Desk setups
- Packing videos
- Tutorials
Arrange the objects carefully because top-down shots make spacing and alignment very noticeable. Leave enough room between important items so the frame does not feel crowded.
Try Bird's-Eye and Worm's-Eye Views
A bird's-eye view places the camera high above the scene. It can show patterns, layouts, groups, and large areas that are difficult to read from eye level.
A worm's-eye view takes the opposite approach by placing the camera extremely low. It can make buildings, trees, and other tall subjects appear much larger.
These extreme perspectives can also create distortion, especially with a wide lens used close to the subject. Use them with a clear visual reason rather than adding them simply to make a shot unusual.
Use Dutch Angles With Care
A Dutch angle tilts the camera so the horizon is no longer level. It can create tension, imbalance, or a stylized look. This technique works best in small doses. If every shot is tilted, the effect becomes less noticeable and can make the footage harder to watch.
Add Camera Movement to Creative Camera Angles
A different camera position can improve a static shot, while controlled movement can add another layer of visual interest. The movement should have a clear purpose instead of appearing in every shot.
Try Push-In and Pull-Out Shots
Move the camera slowly toward the subject for a push-in. Move away for a pull-out. A push-in can bring attention to a detail or action. A pull-out can reveal the larger setting around the subject. Move at a steady speed and keep the subject in a useful position within the frame.
Orbit Around the Subject
For an orbit shot, move around a stationary subject while keeping the camera pointed toward it. This can create a strong sense of depth because objects at different distances shift across the frame at different rates. Keep the movement smooth and watch the background. A cluttered background can make an orbit shot harder to follow.
Try Tracking and Reveal Shots
A tracking shot follows a moving subject. A reveal shot uses movement to gradually show the subject from behind a foreground object. For example, start with a tree blocking part of the frame, then move the camera sideways to reveal a person walking along a trail. These techniques can add motion without requiring fast or complicated camera moves.
Use a Flexible Tripod Stand for More Creative Camera Angles

Creative camera placement can be difficult to hold by hand, especially for low, high, or unusual positions. A flexible tripod stand can make these setups easier to stabilize and repeat. A flexible tripod with adjustable legs can adapt to different surfaces and positions. Some models also use a ball head that lets you fine-tune the camera direction after the tripod is placed.
Use a Flexible Tripod as a Camera Stand
A compact camera tripod can hold a camera at a low table, on a desk, or close to the ground. This gives you more choices than keeping the camera at standing height. It can also help with solo filming. Set the camera in position, frame the shot, start recording, and step into the scene.
Create a More Flexible Camera Rig
A flexible tripod can also support a small creator setup when the camera, phone, or other compatible accessories need to stay in a specific position. Keep the total weight within the tripod's rated capacity. Check the mounting connection and make sure the setup is stable before recording, especially when the camera is positioned above people or equipment.
Try Handheld and Selfie-Style Positions
Some compact tripod designs can also work as a handheld grip. This can help solo creators switch between a fixed shot and a handheld perspective without carrying several pieces of gear. For selfie-style filming, keep the camera far enough away to include the framing you want, and check the background before recording.
Practice Creative Camera Angles With One Subject
You do not need a complicated scene to improve your camera skills. Pick one subject and photograph or film it from several positions so you can see how small changes affect the final frame.
Try this 10-shot exercise:
- Eye-level shot
- Low-angle shot
- High-angle shot
- Ground-level shot
- Three-quarter shot
- Side profile
- Rear angle
- Wide environmental shot
- Close-up
- POV or foreground-framed shot
Review the results together. Look at the background, subject size, depth, lines, and overall feeling of each frame. This exercise also helps you build a personal set of camera angles that you can repeat during future shoots.
Create Better Camera Angles by Moving Your Camera
Creative camera angles can start with a simple move. Raise the camera, lower it, step to the side, get closer, or use a nearby object as a frame. A flexible tripod can help keep unusual positions steady, too. The next time a shot feels flat, change your viewpoint first. A small shift can give the same subject a fresh look.
FAQs About Creative Camera Angles
Q1: How Can I Make My Camera Angles More Creative?
Change the camera's height, horizontal position, distance, and direction. You can also use POV shots, reflections, foreground objects, overhead views, and ground-level perspectives to add variety.
Q2: What Is the Best Camera Angle for Beginners?
Eye level is a useful starting point, but beginners can quickly create more variety with low-angle, high-angle, three-quarter, and overhead shots. Try several positions with the same subject and compare the results.
Q3: Do I Need Special Equipment for Creative Camera Angles?
No. Many creative angles only require you to reposition your phone or camera. A tripod can make unusual positions easier to hold, especially for solo filming, low shots, overhead setups, and hands-free recording.
Q4: How Many Camera Angles Should I Use in a Video?
There is no fixed number. Use enough angles to give the sequence visual variety while keeping the action easy to follow. Choose each perspective for a clear visual reason rather than adding angles simply to make the video look different.