

Key Takeaways
- Traditional tripods fail on irregular ground because rigid legs cannot adapt to slopes, rocks, or trees.
- Assessing surface shape, material, attachment points, and camera weight determines the safest mounting method.
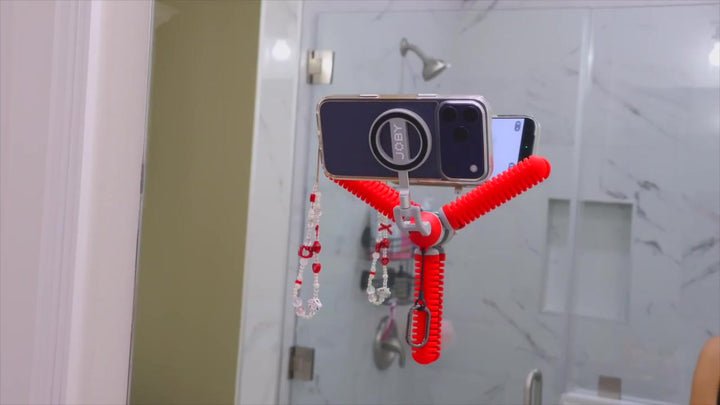
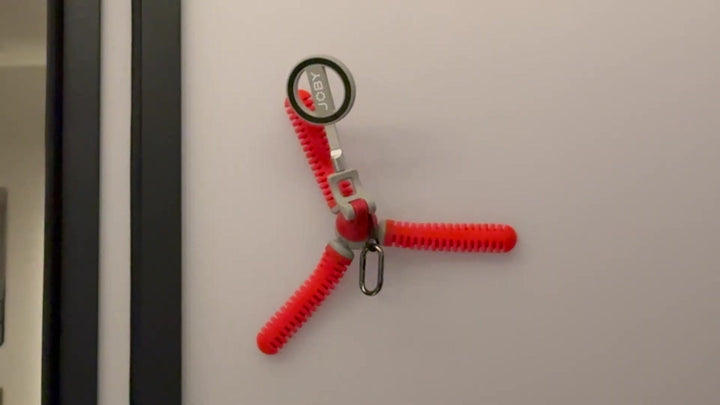
- Wrap flexible legs around railings, rely on suction for smooth glass, or use magnets for lightweight phones.
- Keep the center of gravity low and test stability before walking away.
- Adapting your gear to the terrain opens up unique, creative shooting angles.
| Surface / Situation | Recommended Approach |
| Uneven ground or rocks | Flexible tripod for camera setup with independent leg control |
| Tree branch or metal railing | Flexible tripod with wraparound legs |
| Smooth glass or car window | High-strength suction mount |
| Metal post with a smartphone | Magnetic mount or phone adapter |
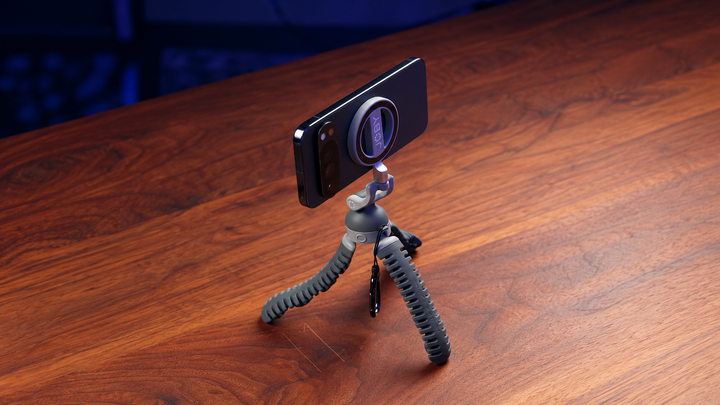
| Flat boulder or low stone wall | Direct base placement with a flexible tripod stand |
| Heavy DSLR or mirrorless system | High-capacity flexible tripod for DSLR gear |
Shooting outdoors often means dealing with jagged rocks, steep slopes, branches, and narrow rails instead of flat floors. Trying to force a rigid tripod onto irregular ground usually leads to crooked shots or tipped gear. Adapting your support system to the terrain opens up far more creative possibilities than hunting for a flat spot.
Why Is It Difficult to Mount a Camera on Uneven Surfaces?
Setting up a solid shot outdoors often means dealing with awkward terrain like jagged rocks, steep dirt slopes, and tree branches. Standard gear quickly shows its limits off the pavement.
Standard three-legged supports rely on level ground to distribute weight evenly. On irregular terrain, the legs cannot make equal contact with the surface. When one leg sits higher than the others, the center of gravity shifts outside the base, making the whole setup prone to tipping over.
Slopes make framing horizontal shots frustrating, while loose gravel or narrow tree limbs offer very little grip area. Outdoor environments rarely provide a convenient flat platform, so forcing a rigid setup onto irregular ground risks dropping your gear. Instead of trying to force the environment to fit your gear, the smartest approach is adapting your support system to match the landscape.
Assessing the Terrain for Camera Mounting on Uneven Surfaces
Before unbagging your gear, spend ten seconds scanning the spot you picked. Evaluating the terrain beforehand helps you choose the safest, most stable setup:
- Surface Shape: Is the terrain flat, sloped, irregular, narrow, or rounded?
- Surface Material: Are you placing gear on rock, wood, metal, glass, concrete, or loose soil?
- Available Attachment Points: Look for sturdy branches, poles, fences, railings, or rock ledges.
- Camera Weight: Are you mounting a smartphone, action camera, compact camera, mirrorless body, or a heavier camera setup?
Matching these physical factors prevents accidents and helps you pick the right tool for the job.
5 Ways to Securely Mount a Camera on Uneven Surfaces

Different environments require different tools, so having a few versatile mounting methods ready ensures you can capture great shots anywhere.
1. Position a Tripod Directly on Uneven Ground
Adjusting each leg independently allows a standard or flexible camera tripod to match uneven terrain. Extend the downhill leg longer than the uphill legs to keep the center column vertical. Keep the center of gravity low by avoiding maximum height extensions on steep inclines. Use non-slip rubber feet or terrain spikes to bite into soft soil or rock. Always give the camera setup a gentle push test to confirm balance before hitting record.
2. Wrap a Flexible Tripod Around a Secure Object
When ground space is completely unavailable, use a flexible tripod stand to grip solid objects like tree branches, park fences, or metal poles. Wrapping changes the core strategy from standing on a surface to actively gripping it. Multi-jointed flexible tripod legs wrap tightly around structures, converting vertical posts into instant support systems. This method lifts your setup off dirty or unstable ground entirely while opening up elevated angles.
3. Use a Suction-Based Mount on a Smooth Surface
Glass windows, polished metal, and smooth tiles offer strong mounting spots if you use a suction cup mount. Airtight seals let the mount grip car windows or smooth building surfaces through a vacuum. However, suction mounts are strictly surface-dependent. Dirt, rough wood, or porous stone will break the vacuum seal instantly, making suction a specialized tool rather than a universal outdoor fix.
4. Use a Magnetic Mount When the Surface and Device Allow It
Magnetic mounts and MagSafe-compatible phone accessories provide rapid attachment to steel beams, iron railings, or metal posts. Magnetic mounts offer quick setup times for lightweight devices like smartphones or tiny action cameras. However, heavy DSLR bodies and large zoom lenses exceed the weight capacity of standard magnets. Always check the rated load capacity and use dedicated safety tethers when using magnetic attachments outdoors.
5. Find a Stable Natural Platform
Sometimes the best mount requires no extra hardware at all. Flat boulders, sturdy fallen logs, masonry walls, and wide rock ledges offer built-in support bases. Resting a flexible camera tripod directly on a flat stone gives you rock-solid stability without elevated risks. Using natural platforms keeps your setup minimal while taking full advantage of the landscape.
Safety Measures for Securing a Camera Tripod on Uneven Ground
If you don't follow simple rules of physics and balance when installing, even the most flexible mounting setup could fail.
Keeping your gear safe requires active attention to balance. Keep the heaviest parts of your camera centered directly over the core support points rather than leaning out over empty space.
When using a flexible tripod for DSLR setups, double-check that every joint is locked firm and each leg wraps completely around its target anchor point.
Frame your shot carefully, then apply slight downward pressure with your hand to test structural strength.
Never walk away from a mounted camera without running this quick stability check first.
How to Get Better Angles on Difficult Terrain

Working on tricky terrain opens up creative visual options that flat-ground setups cannot match.
- Lower the camera: Drop your setup close to rocks or soil to add dramatic foreground detail and depth to your shot.
- Wrap around an elevated branch: Anchor flexible tripod legs to higher tree limbs to capture unique overhead angles without carrying heavy jib arms.
- Emphasize natural slopes: Work with steep inclines instead of fighting them. Tilting your framing along terrain lines adds dynamic energy to landscape photos.
- Rotate your framing: Switch between portrait and landscape modes on your mount to frame tall trees, waterfalls, or narrow rock crevasses cleanly.
- Try unconventional anchor points: Grip park benches, bridge railings, or low stone walls to uncover perspectives standard tripods miss.
What to Avoid When Mounting on Difficult Terrain
A single misstep on rough ground can send expensive photography gear tumbling down a rocky slope or into water.
- Mounting on weak structures: Wrapping gear around dead branches or loose fence pickets invites sudden drops.
- Overloading weight limits: Mounting heavy camera setups on lightweight flexible tripod models weakens joint grip strength.
- Ignoring center of gravity: Off-center camera weight causes top-heavy setups to flip unexpected on inclines.
- Using one method everywhere: Forcing a suction mount onto rough wood or a magnet onto aluminum leads to immediate failure.
- Skipping the stability test: Leaving equipment unattended without physically checking grip strength first.
- Placing gear in drop zones: Positioning cameras directly over cliffs or deep water without safety cables attached.
Expanding Photography Possibilities on Difficult Ground
Tricky terrain should never stop you from getting clear, sharp images. Modular camera gear like a flexible tripod for camera equipment turns unpredictable obstacles into solid mounting points. Multi-jointed leg systems rated for 1 kg to 3 kg loads give outdoor photographers freedom to anchor heavy cameras securely onto fence rails, thick tree limbs, and uneven boulder fields.
FAQs About Camera Tripods for Uneven Terrain
Q1: Can you use a tripod on uneven ground?
Yes. You can use a tripod on uneven ground by adjusting each leg length independently, keeping the center column low, and using non-slip rubber feet or spikes for traction.
Q2: How do you secure a camera to a tree branch?
To secure a camera to a tree branch, use a GorillaPod camera mount or a flexible tripod with flexible legs. Wrap the joints tightly around a thick, living branch, ensuring at least two full leg loops grip the wood securely.
Q3: What is the best tripod for uneven surfaces?
The best tripod for uneven surfaces is a GorillaPod for camera setups or a flexible camera tripod with multi-jointed legs that adapt independently to rocks, slopes, and non-flat surfaces.
Q4: Is it safe to mount a camera on a sloped surface?
It is safe if you widen the tripod base, position two legs downhill for support, keep the camera body centered over the support area, and test stability before walking away.