


Clean Audio Enemies, Part 2: Vibrations
10 October 2023
Introduction:
In our journey for pristine audio, we've already tackled the wild winds in Part 1. But guess what? Wind isn't the only nemesis standing between you and top-notch sound. Brace yourselves as we dive into Part 2 of the audio adventure - Vibrations! 🎤🚀
Demystifying Vibrations: What You Need to Know ⚡️
Now, let's get down to the nitty-gritty of vibrations. You see, microphones, those magnificent sound-catchers, aren't just experts at picking up your voice; they're also pros at snatching physical vibrations (we call it handling noise). It all happens in the mic's sensitive capsule, snugly attached to the rest of its assembly.
In the cozy confines of a studio, these pesky vibrations aren't much of a bother. Microphones are tucked away on sturdy stands, and we're golden, right? Well, mostly. But here's where things get spicy.

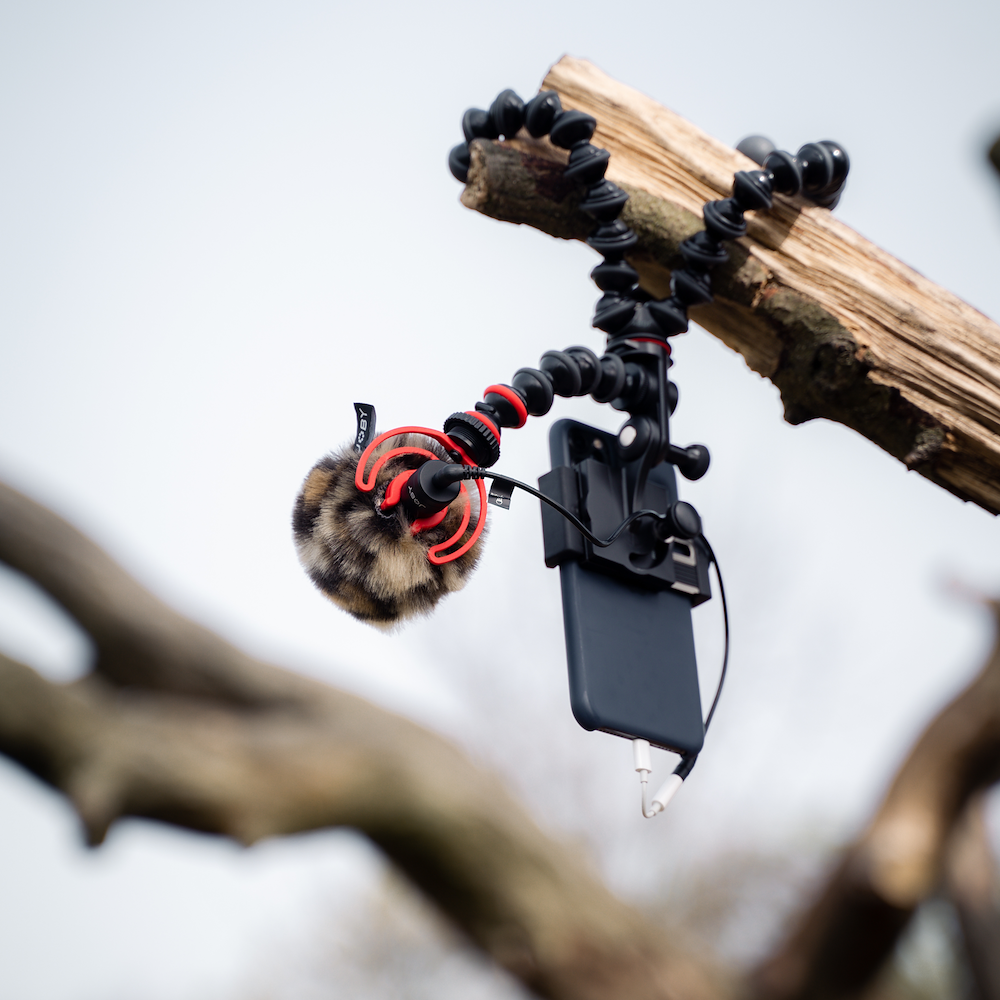
Enter: Shockmounts 🌟
Vibrations become party crashers in dynamic scenarios where cameras dance, subjects groove, and you can't chain your mic to one spot. That's where our trusty sidekick, the shockmount, swoops in to save the day!
A shockmount is like a mic's best friend—it keeps them safe from the chaos of vibrations. It's crafted from a mix of materials like elastic bands, rubber, and special plastics, designed to decouple the microphone from its unruly surroundings. Decouple? That's just a fancy word for putting a barrier between your mic and those pesky vibrations, like building a fortress of silence!
Now, here's the fun part: shockmounts aren't just any sidekicks; they come straight from the glitzy world of cinema and documentaries. They're the heroes that hush the handling noise and vibrations on movie sets. Imagine recording audio during an intense action scene—every move and tremor gets amplified. Shockmounts save the day, every day. 😎
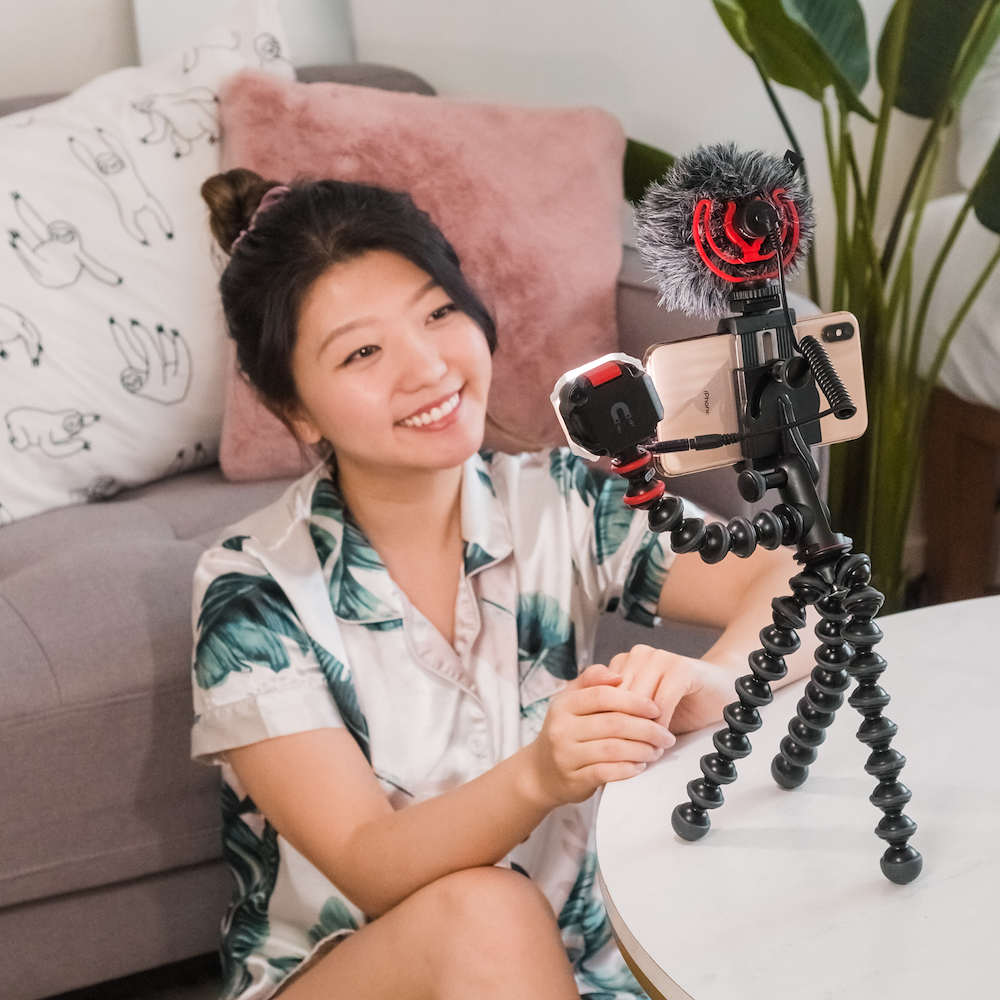
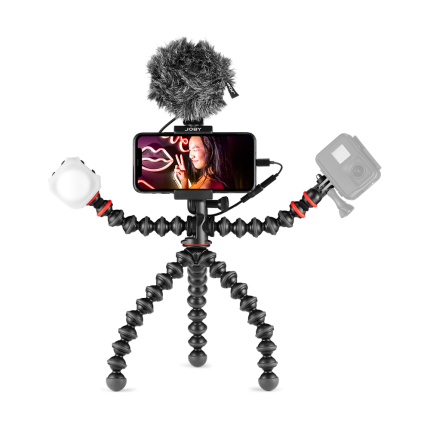
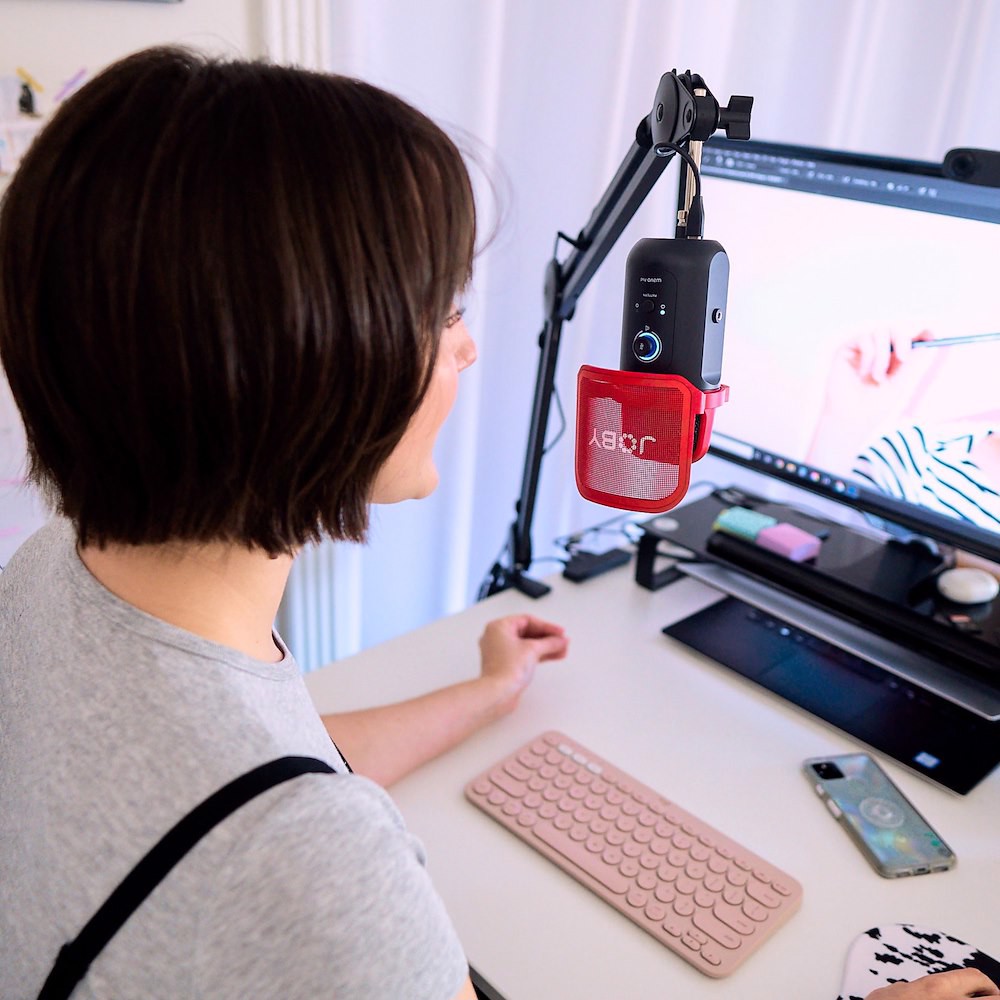
Vlogging Vibes: JOBY to the Rescue! 📸
In the world of vlogging and content creation, things are a tad different, but the need for peace and quiet remains. While some creators wield booms and mic stands like pros, many prefer a trusty spot right on top of their camera—the hotshoe.

It's convenient, sure, but it's also a magnet for noise and vibrations. Going handheld? Brace yourself for a shaky audio rollercoaster. Every step jolts your camera, and your audio quality takes a nosedive.
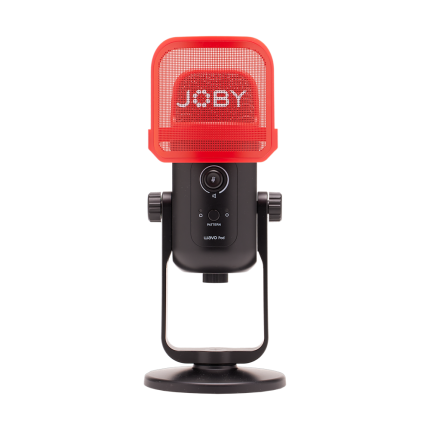
But worry not, dear creators! From our entry-level to the advanced , you have a performing and trusted shockmount that makes creating content easier. All our on-camera JOBY mics come equipped with premium Rycote shockmounts, the superheroes of wind and vibration dampening. These folks are the go-to for pros worldwide, trusted in the realm of cinema and documentaries.
Bonus Tip: Dial Out the Rumble 🎶
Shockmounts are great, no doubt, but they're not superheroes. Some vibrations slip through, especially the sneaky low-frequency ones. These aren't your friends; they're just noise from traffic or humming appliances.
Sounds under 100Hz are like the grumbly bass at a party where the real star is speech intelligibility. Our directional microphones, like the , come with a sweet low-cut filter preset, hanging around 80-100 Hz.
A low-cut filter, also called a hi-pass filter, is a specific type of equalizer curve that comes from parametric equalizers. In simple terms, a low-cut filter literally “cuts” all sound below the specified frequency, called “cutoff”. It's like a sound bouncer; it kicks out all the noise below the frequency you set. Sayonara, rumble! 👋
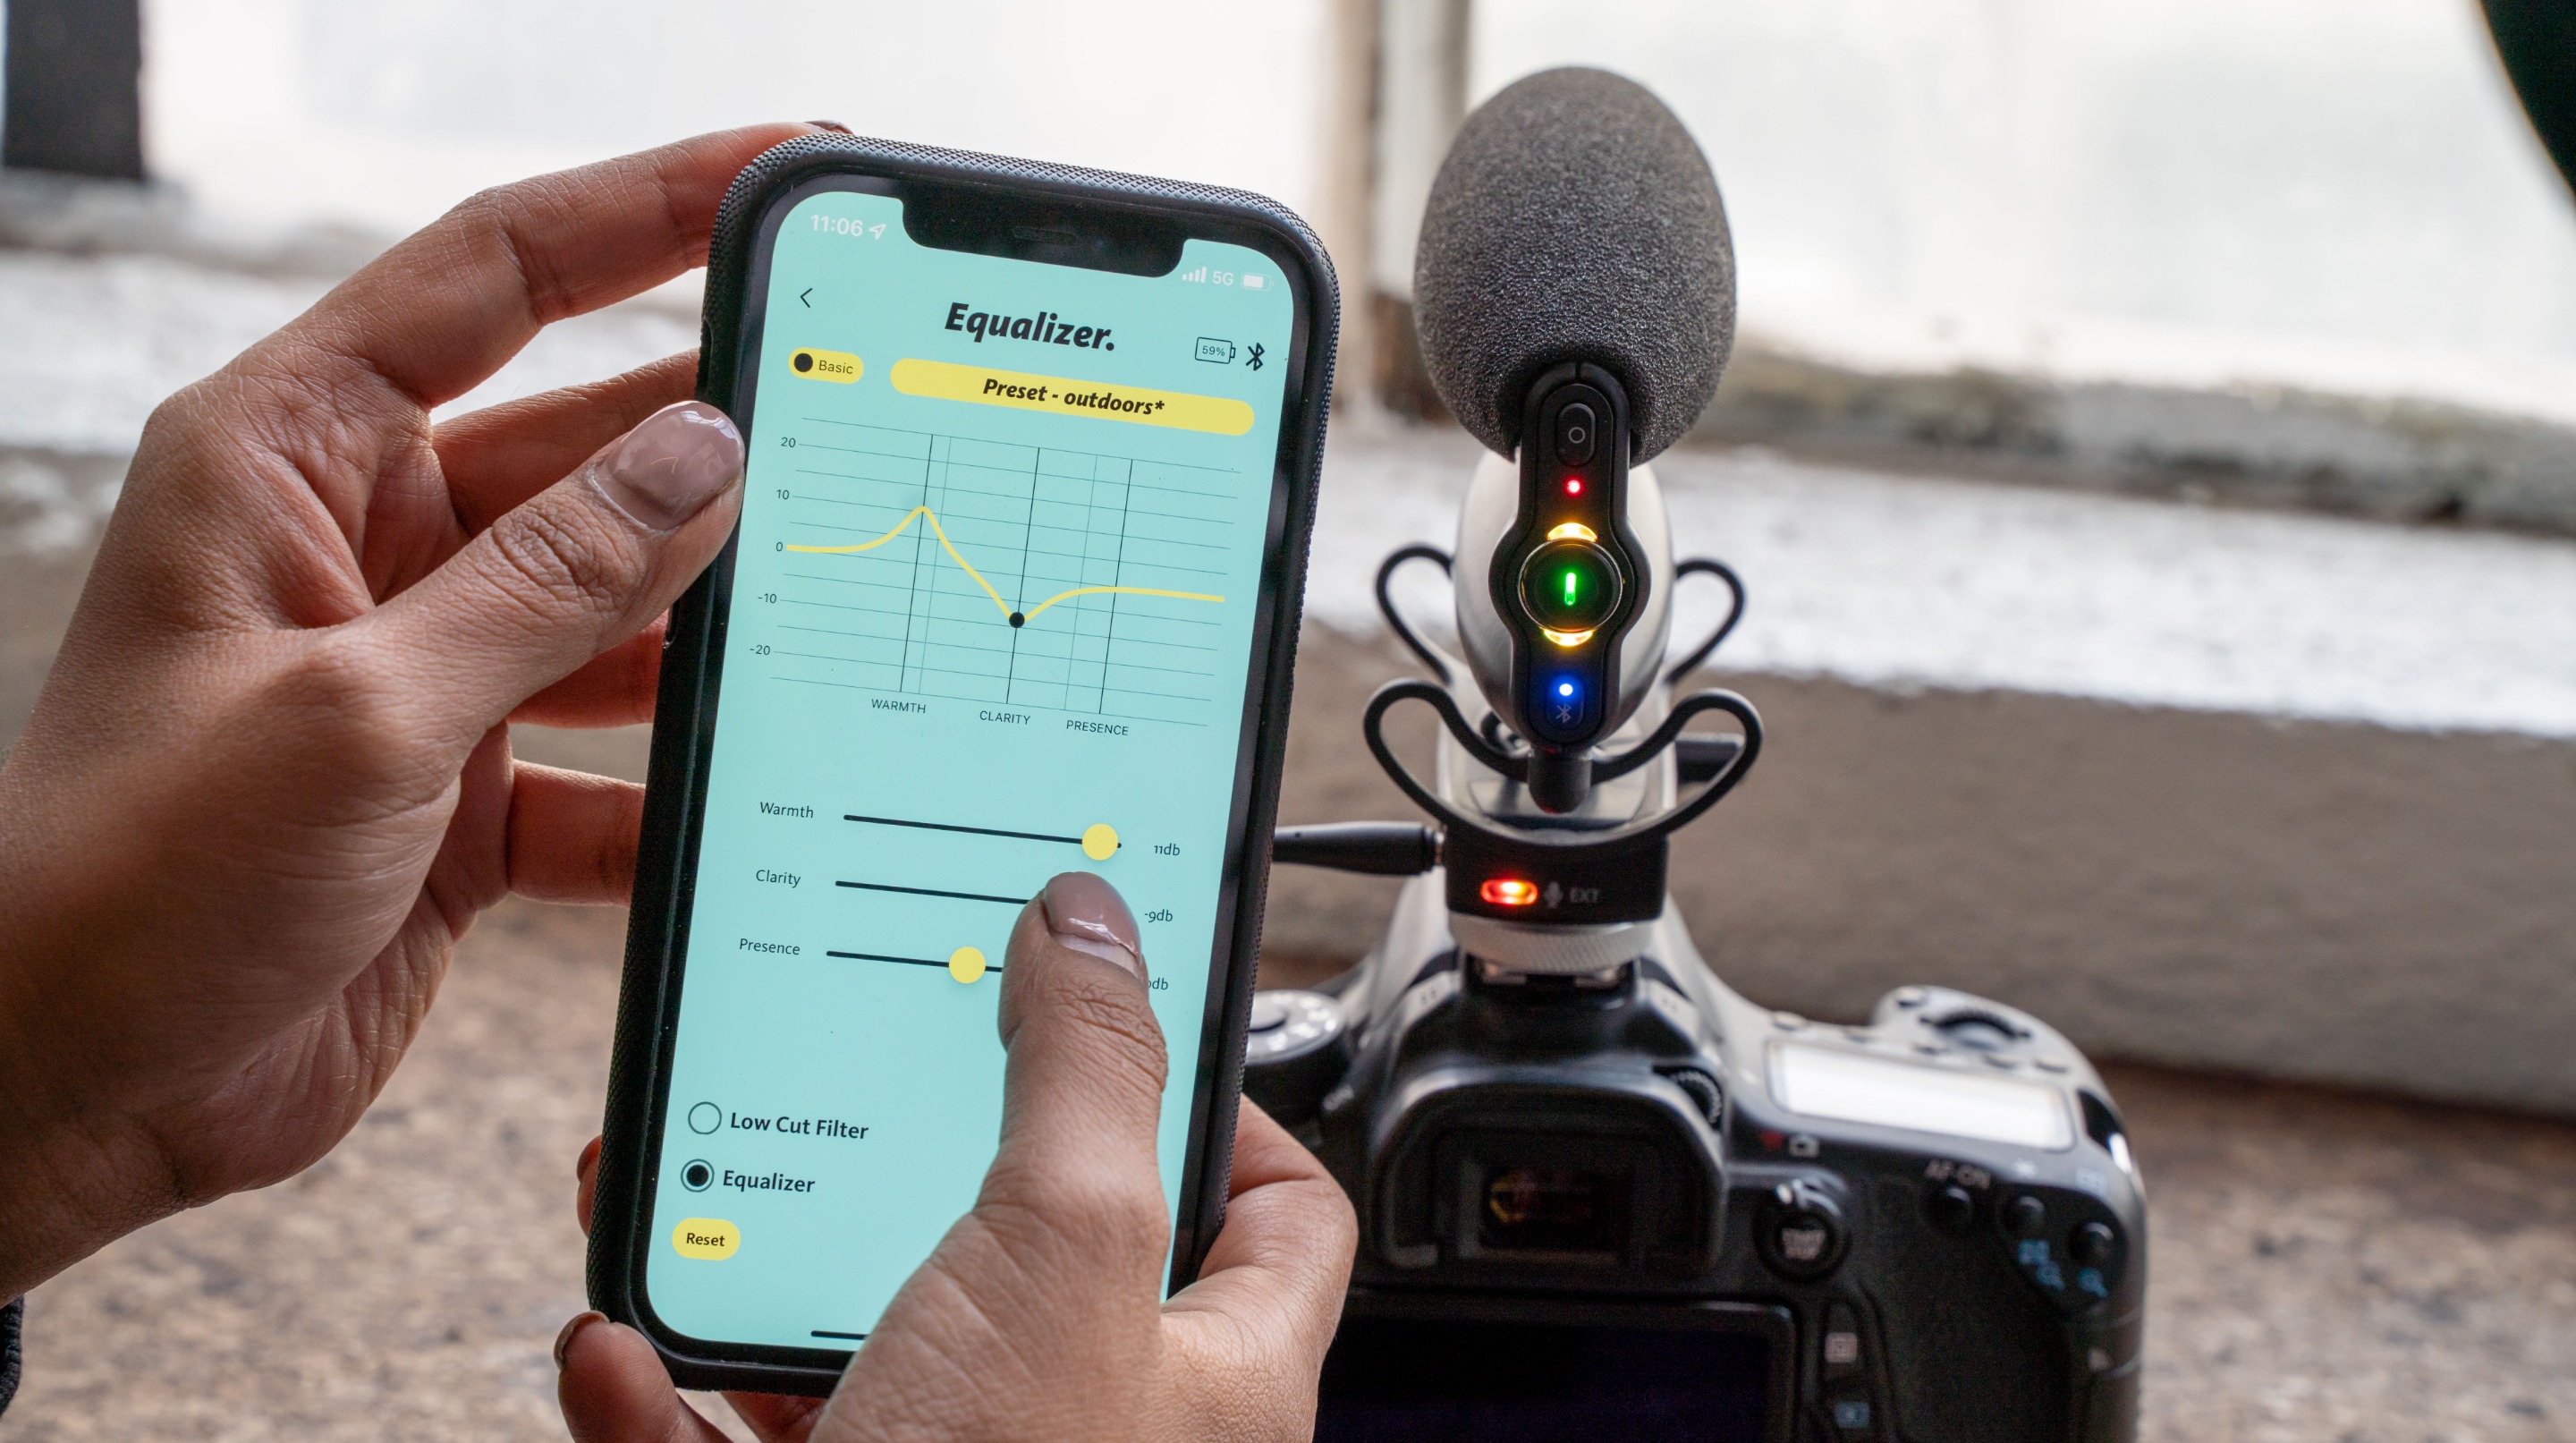
But wait, there's more! Activating the low cut helps capture cleaner audio with a very minimal tradeoff. This step can be your secret weapon against the dreaded clipping of your camera preamps. The low-cut filter acts as a buffer, preventing those unexpected peaks and ensuring your audio stays in the sweet spot.
Now, here's the tip that suits every creator's groove: Leaving the low-cut filter always on can be a lifesaver, especially for beginner creators who are juggling a dozen things at once. Experienced creators on the other hand, might choose to activate it only in outdoor or dynamic situations when needed. In short, it’s your audio toolkit; use it wisely to keep your content sounding as professional as it looks.
Conclusion: Silencing the Vibes 🎬
In the battle against vibrations, a few tricks and the right gear are all you need to keep your content rocking and rolling. Nothing can stop you from creating the content you dream of! 🚀
Stay tuned for Part 3, where we'll dive into electrical noise, distortion, and gain staging in a simple guide for creators at all levels.
Have burning questions or juicy topics to share? Drop 'em in the comments below, and remember—let the good times roll and have fun, create! 🎥🎤